Playing as The Artist in Dead by Daylight requires advanced skills and experience. She is a highly complex killer with an extremely high skill ceiling. Although she has standard killer attributes, her Birds of Torment ability provides massive map pressure. In this post, we’ll explore the best Artist builds to maximize her potential throughout your matches.
Best Artist Build 2024

The artist has an amazing ability to influence across the map, which, when combined with certain perks, can be extremely nasty. By using these perks, we can point out vulnerable survivors early on, making sure our focus is on advantageous locations. After securing our first down, a lot of these perks allow you to snowball, interrupting survivors’ actions and placing constant pressure.
- Lethal Pursuer (The Nemesis) – You can reveal the auras of every Survivor for 9 seconds at the beginning of the trial. The duration of a Survivor’s aura is extended by 2 seconds each time it appears.
- Scourge Hook: Pain Resonance (The Artist) – Up to 4 randomly selected hooks are converted into scourge hooks at the beginning of the trial. Their auras are revealed white to you. The trial begins with 4 tokens. Each Survivor decreases one token the first time they are hooked on a scourge hook, and the generator with the most progress explodes, instantly losing 25% of their progress and beginning to regress.
- Dead Man’s Switch (The Deathslinger) – For the next 30 seconds, Dead Man’s Switch becomes active when you hook a Survivor. When Dead Man’s Switch is in effect, any Survivor who leaves repairing a generator before it is completely fixed causes The Entity to stop the generator until it is fixed. A white aura surrounds affected generators.
- Barbecue & Chilli (The Cannibal) – Once you hook a survivor, it will reveal the auras of every other survivor for 5 seconds as long as they are more than 40 meters away from the hook.
Gen Control & Endgame Artist Build
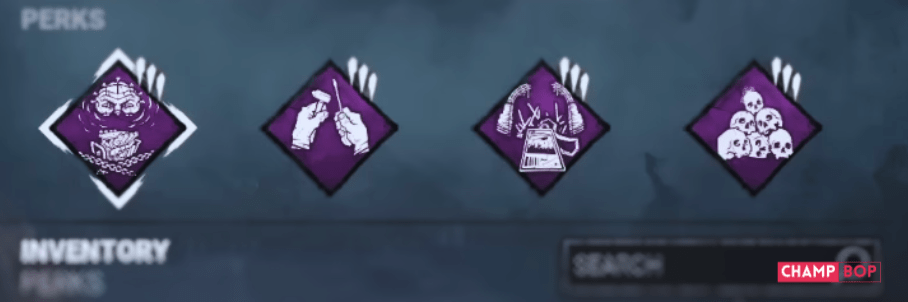
By using this build, you can cause a serious slowdown in generator progress. This can help you anticipate when generators are about to be completed, allowing you to punish the survivors effectively. It also provides a strong endgame strategy by delaying gate opening and allowing you to instantly down survivors.
- Deadlock (The Cenobite) – After repairing a generator, The Entity disables the generator with the most progress for 30 seconds. You can see its white aura at this time.
- Tinkerer (The Hillbilly) – When a generator is repaired to 70% progress, you will receive a loud noise notification and the Undetectable status effect for the next 16 seconds. This effect can only be activated once on each generator.
- No Way Out (The Trickster) – No Way Out receives a token upon successfully hooking a Survivor for the first time. No Way Out comes on once the exit gates are powered on. You hear a loud noise alert whenever a Survivor engages with an exit gate switch. Then, for a further 12 seconds for every token you possess, the Entity blocks both exit gate switches.
- Hex: No One Escapes Death (General Perk) – This Hex is applied to any Dull Totem that remains on the map after the exit gates are powered. As long as this Hex stays up, Survivors experience the effects of their exposed status. You are now moving at a 4% faster speed. The Hex Totem’s aura is visible to the Survivors at a distance of 4 meters after the Hex’s effect is made known to them. Over the next thirty seconds, this range gradually increases to 24 meters.
All-purpose Artist Build
This build seems to be a good combination of the previous two builds in terms of having fun and tactics you can pull off. It provides useful information when more than one survivor is working on a generator. It also forces survivors to leave the generator or risk getting attacked by birds. Additionally, it helps in delaying the opening of gates in the late game.
- Discordance (The Legion) – A yellow aura surrounds any generator that 2 or more Survivors are repairing within a 128-meter radius. Discordance causes the generator to make a loud noise notification when it is first highlighted. The aura lasts for an additional 4 seconds after the generator is out of reach or is no longer being fixed by 2 or more Survivors.
- Dead Man’s Switch (The Deathslinger) – For the next 30 seconds, Dead Man’s Switch becomes active when you hook a Survivor. When Dead Man’s Switch is in effect, any Survivor who leaves repairing a generator before it is completely fixed causes The Entity to stop the generator until it is fixed. A white aura surrounds affected generators.
- Barbecue & Chilli (The Cannibal) – Once you hook a survivor, you can see the auras of every other survivor for 5 seconds as long as they are more than 40 meters away from the hook.
- No Way Out (The Trickster) – No Way Out receives a token upon successfully hooking a Survivor for the first time. No Way Out comes on once the exit gates are powered on. You hear a loud noise alert whenever a Survivor engages with an exit gate switch. Then, for a further 12 seconds for every token you possess, the Entity blocks both exit gate switches.
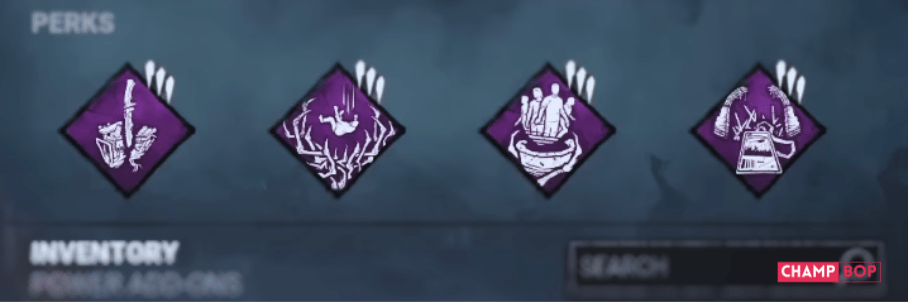
Best Artist Add-ons
- Severed Hands – Survivors who come within 3 metres of swarmed survivors are also swarmed.
- Matias’ Baby Shoes – You can see the auras of survivors within 5 metres of idle Dire Crows for 3 seconds.
- Festering Carrion – Reduces Birds of Torment’s cool-down time by -0.5 seconds after launching Dire Crows.
- Garden of Rot – After repelling the Swarm, Survivors suffer from the Exposed Status Effect for 4 seconds.
- Thick Tar – The Repel duration for Swarmed Survivors is increased by 0.5 seconds.