The ever-growing roster of 38 current killers in Dead by Daylight offers survivors a lot of unique challenges. Each killer has different abilities and playstyles, so understanding how to counter their strengths and exploit their weaknesses is more important than ever. In this How to Counter Every Killer in DBD guide, we’ll go over each killer one by one and provide 3 expert tips to help you identify their weaknesses and use them to your advantage during the trial.
Table Of Content
- The Trapper
- The Wraith
- The Hillbilly
- The Nurse
- The Shape
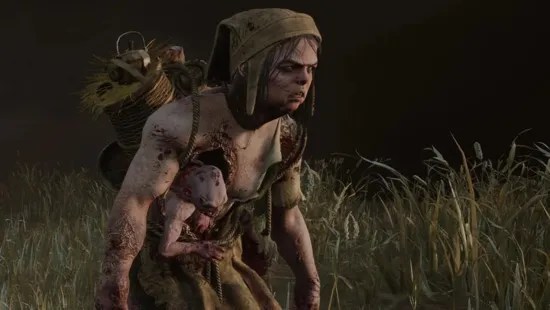
- The Hag
- The Doctor
- The Huntress
- The Cannibal
- The Nightmare
- The Pig
- The Clown
- The Spirit
- The Legion
- The Plague
- The Ghost Face
- The Demogorgon
- The Oni
- The Deathslinger
- The Executioner
- The Blight
- The Twins
- The Trickster
- The Nemesis
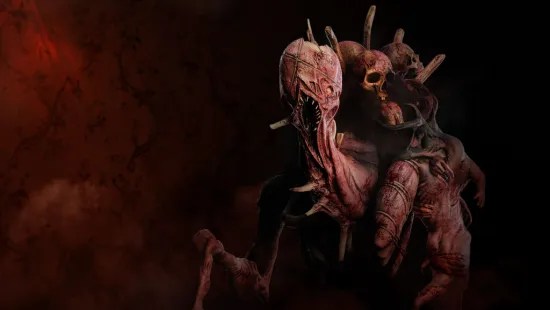
- The Cenobite
- The Artist
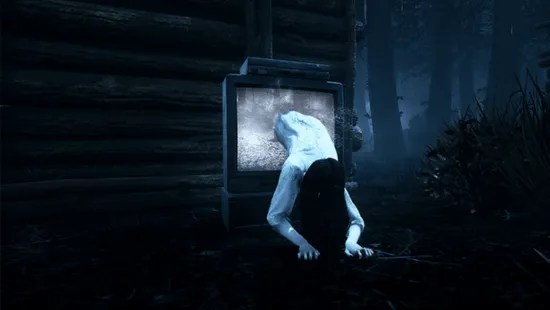
- The Onryo
- The Dredge
- The Mastermind
- The Knight
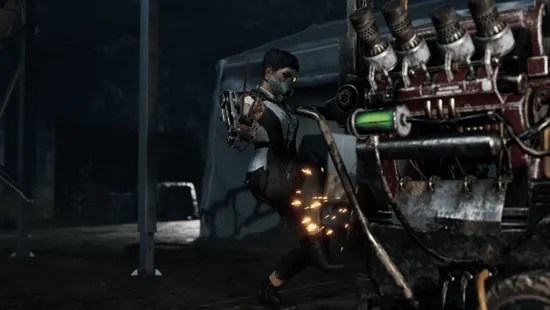
- The Skull Merchant
- The Singularity
- The Xenomorph
- The Unknown
- The Good Guy
- The Lich
- The Dark Lord
- The Houndmaster
How to Counter the Trapper in Dead by Daylight
- Disarm traps in his setup area early
- Get into an early chase with Trapper
- Abandon loops if the trapper sets a trap while in chase
Normally, a good Trapper would take the early game time to set up traps, especially in the area that he’s around. Keep note of this, and once he leaves, it’s your time to get into that area and disarm absolutely every trap.
Getting into an early chase with a Trapper is phenomenal because it stops him from getting any good setup time. This will force him into a chase, and his power will be completely useless.
If you’re ever in a chase with a Trapper and he decides to place down a trap, whether he is faking it or not, just leave the loop completely. Because chances are it’s going to be a dead end.
How to Counter the Wraith in Dead by Daylight

- Vault into clocked wraith to waste his time
- Use audio cues to detect
- Avoid dropping pallets when he’s cloaked
If you see the Wraith and he is currently cloaked, and you expect him to vault a window, you can vault into him to waste a bit of his time. The same can be said for dropped pallets—you can slow vault over to waste some time. This way, the Wraith will have to break the pallet or vault the window because you’ll be in the way.
Wraith makes a very noticeable crackling sound when he’s cloaked. If you look out for it, you can always hear when he’s coming. This way, you don’t need to rely solely on your vision, but you can listen for the audio cues that indicate he’s nearby.
If you ever see the Wraith cloaked, do not drop any pallets. The best thing to do is get to a loop if needed or use a vault, but never, ever drop any pallets when the Wraith is cloaked, as he needs to uncloack to m1. If you do have a dropped pallet while he is invisible, keep vaulting the pallet. Don’t let him kick it by spam vaulting it and force him to come out of invis. It will waste a ton of time against a lot of Wraith players and make pallets last a lot longer.
How to Counter the Hillbilly in Dead by Daylight

- Loop wider when Billy is good at curving
- Play safe when Billy is in overdrive mode
- Crouch tech in desperate situations
If a Hillbilly is trying to curve you, it’s highly recommended that you flare out. By widening your path, you make it more likely that the Hillbilly will miss his curve attempt when using his chainsaw.
Hillbilly’s charge time, chainsaw speed, and cooldown are very quick when he’s in overdrive mode. If you’re looping him during this time, it’s best to play everything safe—pre-drop pallets if needed—because tight loops and sharp corners are your best allies. Keep in mind that Hillbillies will often anticipate your movements. Sometimes, the best strategy is not to counter them directly but to use their anticipation against them.
In a situation where you’re guaranteed to go down, try crouching. While this is inconsistent and doesn’t work 100% of the time, sometimes the hitboxes can mess up, causing the Hillbilly to miss. If you’re going to die anyway, it’s worth a try.
How to Counter the Nurse in Dead by Daylight

- Run near the edge of the map
- Block line of sight often
- Force her to use both blinks
Run the edge of the map as much as possible. Use obstacles such as multiple rocks, Z-walls, and trees to counter the Nurse as much as possible. These can disrupt her blinks because if she aims at a wall or obstacle, her blinks won’t go super far.
When running away from the Nurse, block her line of sight as much as possible. After breaking the line of sight, you can walk to confuse her. For instance, if you run in one direction and she loses sight of you, slowly walking back toward her can cause her to over-teleport, anticipating your future position when, in reality, you’ve gone in a completely different direction.
Whenever possible, try to force the Nurse to use her second blink. This will put her on a longer cooldown. If she decides not to wait for the cooldown, she’ll only have one blink for the rest of the chase, which is significantly easier to manage than dealing with two blinks.
How to Counter the Shape in Dead by Daylight

- Avoid feeding myers stalk
- Pester him if he’s stalked you
- Treat him like a ranged killer
- Play super safe while looping tier 3
This one’s pretty obvious, but the most important thing is just not to feed Myers stalk. Feeding him will doom your team in the long run by allowing him to build up his power and possibly get everyone else killed.
On the opposite side, if you’ve been stalked quite a bit, this is your only time to help the team. You need to pester Myers as much as you can, as he can’t gain stalk on you.
When running away from Myers, treat him like a ranged killer, such as the Huntress. Hide behind trees, walls, or anything you can use to prevent him from building up stalk. And again, just like the first tip, don’t feed him. If you’re near a loop where he can easily look at you, get out of there and head to a safer spot.
A bit of an obvious one, but play things extremely safe in Tier 3. At base, Myers’ power will last 60 seconds, and some add-ons can extend this time, so keep that in mind. Greed as much as you can, especially if you’re about to go down and think his power is about to run out. It’s better to save yourself than to risk a down, which can snowball pretty badly.
How to Counter the Hag in Dead by Daylight

- Crouch over traps to disarm them
- Harass her traps when she’s occupied
- Walk into traps with the camera behind you
As a Survivor, you can crouch over the traps to disarm them. This way, the Hag can no longer teleport to it. This is a well-known tip, but surprisingly, it’s not as widely known as it should be.
Harassing the Hag’s traps is the best way to deal with her power. It’s especially effective when she’s far away from the traps in a chase elsewhere or carrying or hooking someone. You can also do this when she immediately places a trap down if you’re confident in your ability to get close enough.
To counter the Hag’s traps, walk into them while keeping your camera aimed behind you. This will make the traps redirect your view to the fake Hag or Phantom. By doing this, your camera will automatically turn 180°, letting you run away from the trap and avoid its effects.
How to Counter the Doctor in Dead by Daylight

- Stay out of the doctors’ terror radius
- Pre-drop pallets if he is getting close
- Connect your loops to other loops
- Use lockers to avoid screaming
As soon as you hear the Doctor’s Terror radius, get out of there. Remember, the Doctor has Static Blast, which means if you’re in his Terror radius, you will be revealed. Getting out of his heartbeat at all times is the best way to avoid being found. If you’re using the perk Calm Spirit, this is exceptionally helpful because you won’t scream.
Whenever you’re in loops, especially in more unsafe loops. Make sure to pre-drop pallets if you get shocked in an unsafe loop, as you’re likely to be injured. Pre-dropping is the best way to handle this situation.
Possibly the most important thing to do with the Doctor is to extend your loops with other loops. You don’t want to stay in one loop for too long, even if it’s a strong loop because one good shock could get you out. Make sure to extend the loops with others for better survival chances.
If you can time the Doctor’s Static Blast or see him preparing for it, hop into a locker as quickly as possible. This will completely prevent you from screaming.
How to Counter the Huntress in Dead by Daylight
- Be patient and bait her into bad shots
- Greed pallets
- Avoid predictable pathing
When facing the Huntress, be patient during your loops and try to bait her into taking bad shots. For example, if you’re in the Killer Shack and she’s looking through the window, wait a few seconds before re-entering. This encourages her to take a poor shot, allowing you to extend the chase.
Greed your pallets. The Huntress often aims at them, expecting you to drop them. If you hold onto a pallet and continue running, it can be effective, especially if you’re injured. Just be cautious, as she may catch on if you do this too much.
Finally, avoid predictability in your movements. When approaching a vault, dodge left or right at the last second. This may prompt her to throw a hatchet, giving you more time to escape.
How to Counter the Cannibal in Dead by Daylight

- Use windows to vault for most chases
- Greed pallets and mind game his chainsaw sweep
- Don’t go down near basements
- Locker can save your life
Windows are going to be your bread and butter when looping against Leatherface. If you stay close to them and run them tightly, you can eventually force an M1 hit rather than getting one-tapped by the chainsaw. Be sure to vault those windows and run all your loops as tight as possible.
Time a pallet stun for the first time Bubba uses the chainsaw sweep. If he waits it out and respects the pallet to break it, you’ll need to greed pallets and use that as a mind game. Avoid pre-dropping the pallet because if Bubba just breaks it, you’re likely going down.
Don’t go down near the basement. If you feel like you’re about to be downed, move as far away from the basement as possible. If you go down near it, it’s essentially a GG for you and anyone trying to save you.
As a last resort, if there’s nothing else you can do, jumping in a locker might save your life. If you time it correctly, you can jump out at the appropriate moment to extend your chase but only use this option if you’re out of other choices.
How to Counter the Nightmare in Dead by Daylight

- Avoid getting into a three-gen situation
- Split up when working on generators
- Don’t be afraid of his teleports
One of the things Freddy excels at is keeping pressure on generators, which can often force you into a dangerous three-gen situation. From the early game, keep track of which generators you’re working on to avoid creating a three-gen, as Freddy can easily teleport between them, making it difficult to escape.
Make sure to split up when working on generators. Freddy can only teleport to one generator at a time, and there’s a cooldown on his teleportation. By spreading out, even if he teleports to one of you, the rest can continue working on other generators without being interrupted.
If Freddy is baiting a lot of the teleports, don’t leave the generator. Freddy may use add-ons that show his teleportation, and even if he fully teleports, don’t panic and leave. His point of view is locked in during teleportation, so you’ll have time to adjust and keep working on the generator. If he’s faking the teleport, the few extra seconds you gain can make all the difference in completing that gen.
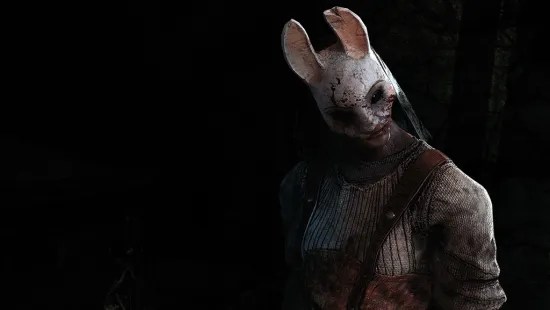
How to Counter the Pig in Dead by Daylight
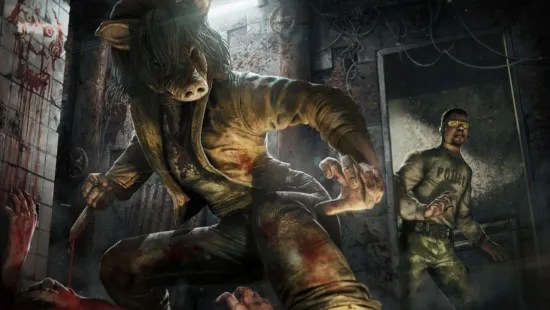
- Leave the loop if she crouches
- Avoid 99%ing generators
- You can still escape with an active trap
If you notice a Pig trying to mind-game you by crouching at a loop, you can simply run away. The time it takes for her to crouch and uncrouch gives you enough time to move to a different loop, vault, or find a safer spot.
Avoid 99%ing generators when facing the Pig. It’s tempting to leave a generator almost finished, but this can backfire. Pig tends to have several perks that can destroy all the progress you’ve made on those gens. Keep working on them and pop them as soon as possible to avoid setbacks.
When you have a trap on your head, don’t panic. Even if the trap is activated, you can still escape through the hatch if it’s open, or crawl out to safety. If the trap was placed after the last generator was popped, you can simply walk out the exit gates.
How to Counter the Clown in Dead by Daylight

- Don’t go to deadzone to avoid the gas
- Holding w often isn’t a bad idea
- Split up and work on generators
You don’t need to go out of your way to avoid the Clown’s smoke. Sometimes it’s best to just go through it, get to the pallet, and drop it instead of avoiding it and running into a dead zone and getting injured.
Running into a dead zone isn’t ideal, so get distance from the Clown. This can be combined with very long chained loops, or holding down W across the map.
Clown has pretty poor map pressure, so use that to your advantage. Split up with your team and work on generators as quickly as you can. That way, if one person is in a chase, you still have enough time to get the generator done.
How to Counter the Spirit in Dead by Daylight
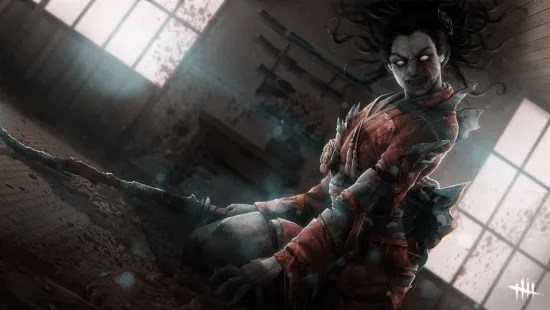
- Avoid getting hit, play stealthy
- Mind game spirit with pallet drops
- Walk slowly after passing a pallet to bait her
- Stun spirit while she’s phasing
When you’re playing against a Spirit, think of it like you’re playing against the Oni. Once you get hit, the game becomes much harder since you’re injured and easier to locate while she’s phasing. Your best option is to play stealthy and avoid getting hit, especially when you hear her phasing near you.
You can attempt to mind-game Spirit after she starts phasing by dropping the pallet on the side closest to you, then fast-vaulting. This will make her think you pulled the pallet on the normal side and vaulted over when in reality, you vaulted to safety.
You can also bait Spirit by waiting near pallets, leaving scratch marks, and slowly walking away. If you have good timing and anticipate when Spirit will be near, you can even try to stun her while she’s phasing.
How to Counter the Legion in Dead by Daylight

- Start running when you hear the music
- Avoid healing unless you have perks or teammates
- Stun legion during feral frenzy
- Stay away from other survivors
The second you hear rock and roll music, which signals Legion’s Terror Radius, immediately get distance from your teammates. It’s vital to split up for the majority of the match to minimize Legion’s power and make it as ineffective as possible.
Avoid healing unless you have healing perks or are near two or more survivors who can heal you quickly. Healing against Legion can be counterintuitive, as they will most likely just stab you with their Feral Frenzy, so only heal if you have support or healing perks.
If you get the opportunity to stun Legion with a pallet during their Feral Frenzy, take it. It’s difficult, but it’s one of the most annoying things to deal with as a Legion. You can try waiting at a pallet, and as soon as Legion decides to swing, drop the pallet on them to force the stun.
As mentioned earlier, stay away from your teammates. Most maps are large, so it’s crucial to spread out. This way, Legion can’t easily reach another survivor to continue hitting them and spreading their Frenzy.
How to Counter the Plague in Dead by Daylight

- Don’t cleanse against the plague
- Use crouching whenever she is puking
- Try to stun the plague during the corrupt purge
When playing against Plague, don’t cleanse. Cleansing will power her up more, making her more dangerous as the game progresses. If you avoid cleansing, Plague will be limited to a maximum of three Corrupt Purges (if she’s running add-ons). If you cleanse, she can continue using her power and the situation can quickly snowball out of control. In the case that you need to cleanse, make sure it’s edge map fountains. This forces the Plague to either have to go out of their way and waste time to get their power or keep trying to down with just their M1.
While Plague is using Corrupt Purge, crouch behind objects to avoid getting hit. Often, the hit won’t register, especially if you cut corners and crouch at the right time. This tactic works well, especially in a chase, as Plague cannot swing her weapon while she’s puking, so crouching can save you from being downed or infected.
If you have the opportunity, pallet stun Plague during her Corrupt Purge. This will completely remove her from her power, effectively disabling a significant portion of her ability and making her much less of a threat.
How to Counter the Ghost Face in Dead by Daylight

- Reveal Ghostface properly
- Force a hit when 99% stalked
- Hide behind things while revealing him
- Take hits for exposed teammates
If you’re trying to reveal Ghostface, make sure that he’s in the center of your screen and enough of his body is visible.
If you feel that you’re about 99% stalked and Ghostface is waiting to hit you, you can force a hit by him. This is especially easy when he’s carrying someone to a hook, as this will reset your stalk and prevent you from going down in one shot.
Another good strategy to reveal Ghostface is by hiding behind something he can’t stalk behind.
If you see that one of your teammates is exposed, be a team player and try to take a hit for them.
How to Counter the Demogorgon in Dead by Daylight
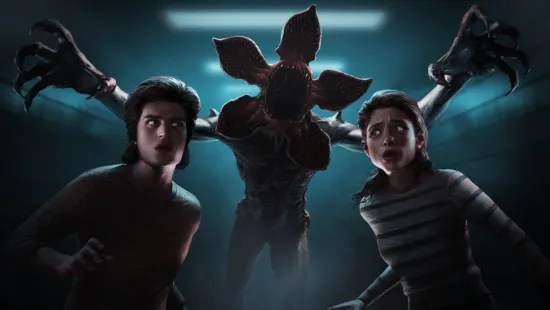
- Mind your pathing
- Avoid being zoned by Demogorgon’s mouth
- Don’t need to break every portal
When facing a Demogorgon, focus on your pathing. Loop in a way that keeps you out of its line of sight and avoids getting zoned by its mouth.
Demogorgons may try to open their mouths to force you away from pallets or vaults. If they are out of range to hit you, don’t get cornered, as this will give them an advantage.
If the Demogorgon places a portal in a low-activity area, like next to a completed generator, you can ignore it. Since the Demogorgon cannot retract its portals, a poorly placed one is one less you need to worry about.
How to Counter the Oni in Dead by Daylight

- Heal quickly
- Use complex and maze tiles vs fury mode
- Mind game his flicks
Healing quickly is essential when facing the Oni, as he gains power from your blood. Unlike with the Legion, fast healing can prevent the Oni from becoming too strong.
Use maze tiles on maps like Orman, Garden of Joy, and Yamaoka to make it harder for the Oni to chase you. Learn these tiles to increase your escape chances.
To avoid the Oni’s hits, combine maze tiles with unpredictable movements. Run in one direction and then abruptly change to the opposite direction, especially near pallets and vaults, to outsmart him.
How to Counter the Deathslinger in Dead by Daylight

- Only sway when he is about to shoot
- Be unpredictable when looping short tiles
- Greed pallets to waste his time
When breaking the line of sight from Deathslinger, avoid swaying left and right, as it slows you down and makes it easier for him to catch up. Move directly towards pallets, vaults, or jungle gyms, and when he’s about to fire, crouch or quickly dodge left or right.
If looping around short tiles, remember that he can shoot over them. Be unpredictable in your movements and change directions to make it harder for him to hit you.
Pallets are essential against Deathslinger but don’t drop them too early when fully healthy. Hold onto the pallet as long as possible to waste time and increase your chances of making him miss his shots.
How to Counter the Executioner in Dead by Daylight
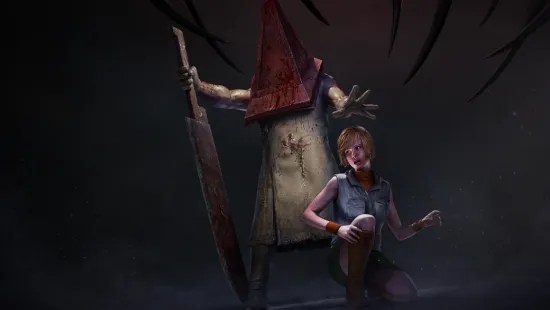
- Loop wide on tall tiles
- Crouch to avoid torment pools
- Save teammates to remove the torment
- Hold W in most cases
When looping against the Executioner, especially in areas without a line of sight, try to loop wide to avoid their Rights of Judgment. If you see pools of blood or the trail of Torment, crouch over them to prevent being afflicted.
If you are tormented, you can only remove the status by rescuing a teammate from the Cage of Atonement. This will also prevent you from being sent to the cage next.
A useful tactic while being chased is to hold down the W key. The Executioner may misjudge your movements and miss their attacks, as they’ll expect you to loop. This unpredictability can throw off their aim.
How to Counter the Blight in Dead by Daylight

- Run around small objects to make him miss
- Use sharp corners to break the line of sight
- Stun him while he’s rushing
When Blight is dashing, try to run around objects like trees or rocks. He cannot make a full 360-degree turn quickly, which makes it harder for him to land his attacks. Use sharp corners to break the line of sight during a normal chase; this is an effective way to make Blight miss or lose track of you.
Timing is crucial when attempting to stun Blight. If you see him rushing towards you, wait until he gets close to a pallet and then drop it. This can completely stop his movement and throw him off course, giving you valuable time to escape.
How to Counter the Twins in Dead by Daylight
- Heal quickly to avoid snowball
- Crouch to hide from Victor’s killer instinct
- Lockers are a safe bet if Twins are far away
To avoid being downed by Victor, heal quickly, as he can only down injured survivors. At least one survivor should be fully healed to reduce this risk.
When Victor is idle or attached to a teammate, crouch to avoid killer instinct. This allows you to crouch up and kick him without being detected. Additionally, when facing Victor, you can vault windows infinitely to deny him a hit or waste a lot of time. Make sure to loop narrow objects like trees, rocks, or even generators, as Victor struggles to backrev properly in tight spaces, making these tiles a 50/50 situation.
Lockers are a safe option against the Twins. If caught by Victor, jumping into a locker gives you a temporary escape, as he can trap you there for 10 seconds. Just make sure you are far enough away to use the locker effectively when he switches to Charlotte.
How to Counter the Trickster in Dead by Daylight

- Use line of line-of-sight blockers like trees and walls
- Greed at high wall tiles and avoid animation locks
- Avoid being in the open during the main event
When facing Trickster, line-of-sight blockers like trees, rocks, and walls are your best friends. Using even the smallest obstacles can make it much harder for him to land his throwing knives, creating an opportunity for you to move around while staying out of his line of sight.
Greeding pallets is a viable strategy when looping Trickster, but it can be dangerous if you’re near high wall tiles. Pre-dropping pallets at the wrong moment may get you downed due to the long animation, so you’ll want to be cautious.
If you find yourself out in the open during Trickster’s Main Event, it’s crucial to move out of the area as quickly as possible. Trickster’s power can shred you in moments when you’re exposed. Always try to make use of map obstacles—even those that don’t fully block the line of sight—because as long as you’re not fully exposed, you can use them to your advantage during a chase, especially while he’s in his Main Event phase.
How to Counter the Nemesis in Dead by Daylight

- Crouch to avoid tentacle strikes
- Split up and delay tier 2 progression
- Pre-drop pallets early vs tier 1
If Nemesis uses his tentacle strike, the hitbox will target the tallest object in front of him, so by crouching, the strike will hit the zombie or an obstacle instead of you, delaying his progression to Tier 2.
In the early game, it’s important to split up to make it harder for Nemesis to infect multiple survivors. If he can’t infect two survivors quickly, he’ll take longer to reach Tier 2. Also, avoid using vaccines too early. Vaccines remove the infection but also speed up his mutation, so wait until he’s at Tier 2 or 3 before using them.
Another useful tactic is to pre-drop pallets before Nemesis hits Tier 2. Without this tier, he has to break the pallets normally, which gives you and your team more time to do gens and escape.
Lastly, take advantage of his zombies by using them as a speed boost. If you’re trying to reach the exit gates in the endgame, the zombies can help you get there faster, especially if you don’t have tools like a flashlight or pallet to get rid of them.
How to Counter the Cenobite in Dead by Daylight

- Solve the box when the pinhead is busy
- Avoid solving the box on death hook
- Run back into him while he uses his chain
- Solve the box, don’t wait for others to do it
The best time to solve the Lament Configuration box is when Pinhead (Cenobite) is in a chase. However, avoid picking it up when he’s recently seen you or is chasing someone else nearby. It’s important to take the box to a secure location first, then solve it to avoid being interrupted.
Never solve the box when you’re on death hook, unless absolutely necessary. If you’re in the chase and Pinhead uses his chains, double backing or going for quick movements can make it harder for him to land his shots. Running at the Cenobite in this scenario can also help you avoid being caught by his chains.
Lastly, if you feel like you have a safe moment to solve the box, don’t wait for someone else to do it. If you wait too long, you’ll just end up in a worse situation and may have missed your opportunity.
How to Counter the Artist in Dead by Daylight

- Use elevation to avoid birds
- Use lockers if the artist is far away
- If you hear crows while on a gen, run to avoid them
If you’re swarmed by The Artist’s crows, getting elevation on certain maps like Swamp or RPD can be a useful strategy. Crows can’t hit you when you’re on a higher level, so this is a neat trick to avoid getting hit.
Lockers can act as a safe haven to get rid of the birds, but only if The Artist is far away. Avoid jumping into a locker if she’s too close, as this can often lead to you getting caught.
You can no longer use flashlights, flashbangs, firecrackers, or party starters to dispel the crows, so don’t waste time trying to use those items for this purpose.
Lastly, if you’re in a high-target area like a generator and you hear crows, it’s best to leave immediately to avoid being hit.
How to Counter the Onryo in Dead by Daylight
- Use the first 30 seconds to find TVs and get the tape
- Look for white TV auras near generators
- Don’t panic if about to be morid
At the start of the match, use the first 30 seconds to find any TVs. Once a TV turns on, it’s ideal for everyone to pick up the tapes, especially in a SWF. If you’re with randoms, take the initiative to do it yourself. Remember, Onryo can only teleport to one TV, so only one person may be interrupted at a time.
If you spot a white TV aura near a generator, make sure to turn it off if your condemn level is low. Failing to do so means Onryo can teleport to that TV, and the aura will disappear as a result. Also, it’s important to know that if you keep turning the tv’s off she’ll basically have no power.
In case you’re about to be morid, don’t panic. The new tape animation is very quick, taking only about 1 second. If you’re fully healthy, you can even put away the tape between getting hit, even if she has Max Save the Best for Last, you’ll only go down and not be morid. So, obviously, one hook is better than being completely morid.
How to Counter the Dredge in Dead by Daylight
- Watch for locker teleports
- Only lock one locker per set
- Mind game to bait teleport
You can tell when a Dredge is teleporting to a locker by noticing that the locker shutters slightly. This is a good indicator when you’re sitting on a generator, especially in areas like the Killer Shack. As soon as you see this, move away to avoid being ambushed.
When dealing with lockers, make sure to lock only one at a time per set. This prevents the Dredge from being able to break both.
When looping against a Dredge, move erratically. The Dredge will often try to mind game you, either by teleporting to lockers or using their Remnants to catch you off guard. To counter this, mind game them back and avoid making obvious moves.
How to Counter the Mastermind in Dead by Daylight

- Heal before using the disinfecting spray
- Flare to bait Wesker’s bound
- Bait him to vault windows or pallets
When facing Wesker, always heal first before disinfecting. Disinfecting reveals your location to him, making it easier for him to track you down. After healing, it’s a good idea to move somewhere else to reset, especially if Wesker is trying to tunnel you, rather than staying near the hook.
One effective strategy against Wesker is to use unpredictable movements. By making sudden in-and-out movements, you can often trick Wesker into using his Bound ability to the wrong direction. Also, another tip is to hug walls tightly when Wesker is trying to catch you with his Bound power. Most Wesker players will try to predict a dodge, especially at a distance, so staying close to your loop and hugging the wall can cause him to miss. This tactic works a lot more often than you might think.
Additionally, you can bait Wesker into using his Bound ability to vault. By quickly running left or right at the last moment, you can make him attempt to grab you during the vault, but in reality, you don’t vault. This may lead to him going through the vault himself and waste a bunch of time.
How to Counter the Knight in Dead by Daylight

- Pre-drop pallets to make guards go around
- Guards go away faster while with the Knight
- Pick up the flag if you have a chance
- Use line of sight to avoid guards
If you’re being chased by The Knight and a guard (or just the guard alone), pre-dropping a pallet will force the guard to go through it, buying you time, as long as you have some distance. However, if you vault the pallet, the guard will also pass through it. This is harder to time, so it’s better to just pre-drop pallets to gain distance.
With a recent update, the Knight’s guards will disappear three times faster if they’re close to him. If you’re in a chase, stay close to the guard to prevent it from disappearing too quickly.
Also, keep an ear out for the horn sound, which indicates that the flag has spawned. If you can, grab it to get a speed boost and make the guard disappear.
Lastly, use the line of sight against the guards. If they can’t see you, even if you’re in their radius, they won’t attack.
How to Counter the Skull Merchant in Dead by Daylight
- Drones can’t scan while the beams are white
- Keep drones near generators up
- If injured with 2 stacks, getting claw-trapped will reset to 0 stacks
When you’re within range of the Skull Merchant’s drone beams, you’ll notice that they turn white instead of orange if the drone cannot scan you. This happens when you’re standing still, crouch-walking, or during the 3-second immunity window after being scanned. Use this window to un-zone yourself—even if you move into the beam or the drone during these 3 seconds, you won’t be scanned again.
When dealing with drones near generators: keep drones near generators up. The Skull Merchant can see when you disable a drone, and it will not scan you while you’re disabling it or working on the generator. Since disabling drones gives the killer information on your location, it’s often safer to leave the drone in place and continue working on the generator.
If you’re injured with two stacks of lock-on and feel safe in your location, intentionally getting claw-trapped can be an effective way to reset your stacks. Letting yourself get claw-trapped and then running the battery out will bring your stacks back to zero without the immediate risk of getting injured again. This is a safer way to reset your lock-on stacks compared to trying to reset at two stacks, which could put you at risk of getting injured again right away.
How to Counter the Singularity in Dead by Daylight
- Use EMP on teammates being chased
- EMP slugged survivors before healing them
- Avoid teammates if you are infected
If a teammate is being chased and you have an EMP, don’t hesitate to run over and assist them. Using your EMP during their chase will force Singularity to reapply the infection, wasting time for the killer.
If a survivor is slugged and infected, avoid picking them up until you EMP them first. If you pick them up before EMPing, they may get back up and infect you as well.
Additionally, if you’re an infected survivor, stay away from other survivors to avoid spreading the infection to them. And, of course, always use your EMP to clear the infection off of yourself.
How to Counter the Xenomorph in Dead by Daylight
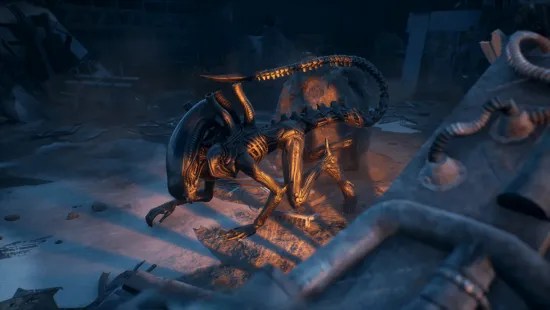
- Use flame turrets as body blocks
- React to the tail attack
- Place flame turrets near a generator
Flame turrets aren’t just for crawler mode—they serve as body blocks against the Xenomorph. The Xenomorph has to deal with a flame turret, or it will lose its power, dropping to a much weaker 115% movement speed. While it only delays the Xenomorph for a few seconds, these can be crucial moments. Place flame turrets where body blocking would be helpful, especially when near other survivors.
When facing the tail attack, many survivors feel it’s impossible to dodge, but it’s actually reactable. Look for two signs: The tail physically rising before the attack initiates and a loud sound cue before the tail hitbox activates. These cues give you a chance to anticipate and dodge the attack.
Finally, always place a flame turret before working on a generator. Not only does it function as a body block, but it also acts as a tracking tool for the Xenomorph, beeping louder as the Xenomorph gets closer, much like an artificial Terror Radius. The flame turret tracks the Xenomorph’s movements, even in stealth mode, for up to 41 meters.
How to Counter the Unknown in Dead by Daylight

- Juke the power by running back into the killer
- Dispel hallucinations when the killer is busy
- Split up from teammates on gens
Most of the time, when The Unknown decides to use their power, they’re anticipating where you’re going to be. Running straight back into them will often make them miss. Just don’t do this at close range because you can get meleed.
Dispel the hallucinations when one of your teammates is being chased or hooked. This way it ensures that you’re not getting interrupted and teleported, and eventually getting hit.
You can tell if The Unknown can teleport to any of the hallucinations depending on if they’re crouching or standing up. If they’re laying on the floor, it means The Unknown cannot teleport to them whatsoever. But if they’re standing up, it means that The Unknown can teleport to them. As mentioned before, only dispel those when you know it’s pretty safe.
Similar to other killers, split up. Don’t stick next to your teammates because one good AOE shot will injure multiple people or get them infected. This can occur very easily if everybody’s on the same objective. So don’t double, triple, or even quadruple up on these objectives. Do them by yourselves so that only one person at a time can get infected.
How to Counter the The Good Guy in Dead by Daylight

- Use the red stain and footprints to track
- Listen to Chucky’s SFX to track his location
- Pre-drop pallets at unsafe loops to avoid mind games
Chucky is incredibly small, making him hard to track. To keep an eye on him, use illusionary footprints or the red stain. These are two reliable ways to spot him, though it’s still challenging due to his size.
Chucky also makes distinct noises, such as giggling, laughing, and trash-talking. These are similar to The Wraith’s breathing or Ghost Face’s whooshing sounds, so you can use these auditory cues to help detect his position, especially when he’s in hidey-ho mode.
Since Chucky is so small, unsafe loops become even more dangerous. He can easily mind-game you, so pre-dropping pallets is a good strategy to avoid getting hit.
How to Counter the Lich in Dead by Daylight

- Always wear two items from chests on the map
- Crouch to avoid Vecna’s skeletons
- Look closely to tell his powers apart
Make sure you’re wearing two items from the chests that spawn around the map, as each chest has different abilities. Some can show you where the giant orb is or when Vecna is flying.
If Vecna calls out his skeletons, crouching will completely avoid them. Even if the skeletons directly touch you, as long as you’re crouching, you’ll be fine.
If you have a keen eye, you can tell which power Vecna is about to use by watching his hand movements, as each of his powers has a different animation.
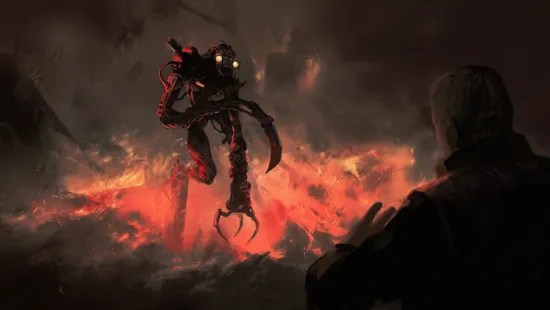
How to Counter the Dark Lord in Dead by Daylight

- Hellfire is predictable; use erratic movements.
- Wolf form pounces are dodgeable in open spaces or tight loops.
- Bat form is harmless; reposition during transitions.
Hellfire functions like Pyramid Head’s ranged attack. Avoid predictable moves like pre-dropping pallets or straight vaulting. Strafe left and right to dodge and don’t step back into the lingering AoE.
The Wolf’s pounce works like Wesker’s Bound but with shorter range. Dodge in open areas or hug loops tightly. Avoid small or straight loops, and use objects to disrupt his pounce path. Watch for his speed boost when collecting scent orbs.
In Bat form, Dracula can’t attack but travels quickly and teleports to pallets or windows. Run through the bats, as they can’t block you, and use his transition animation to vault or drop pallets safely.
How to Counter the Houndmaster in Dead by Daylight

- The dog’s pathing is exploitable; use obstacles to misdirect it.
- Her power requires precision; unpredictable movement helps you evade.
- Capitalize on her setup time to create distance or reposition.
The Houndmaster’s dog tries to drag survivors to the location where her power was activated. Exploit this by moving to areas with obstacles like pallets or windows, forcing the dog to take inefficient paths. Dropping pallets mid-chase can confuse the dog’s route, potentially dragging you further away from her.
Her power is highly telegraphed, giving you opportunities to dodge. Use erratic movement patterns and sharp turns to evade the dog’s trajectory. If she tries to curve the dog around walls, anticipate and reposition to disrupt her aim.
Activating and directing the dog takes time, leaving her vulnerable. Use this downtime to gain distance or move to stronger loops. Her limited mobility means you can often outpace her during the setup phase of her ability.
Sources: The King /Youtube, sh6rpshot /Youtube, Scott Jund /Youtube