The Trapper is a killer in Dead by Daylight that is easy to pick up and play, even for those players without fast reflexes. However, becoming an expert at playing him at higher levels requires predicting the survivors’ movements, which adds to the game’s complexity level. Despite his simplicity, the Trapper can disable loops and take advantage of survivors’ mistakes, so choosing the right build is important. In this post, we’ll discuss the three best Trapper builds.
Best Trapper Build
The Trapper is a killer who relies heavily on time to set up traps. You can choose to not use many slowdown perks and let the survivors do generators, which will result in losing some generators early on. Alternatively, you can use the following build order to set traps early on and be better prepared.
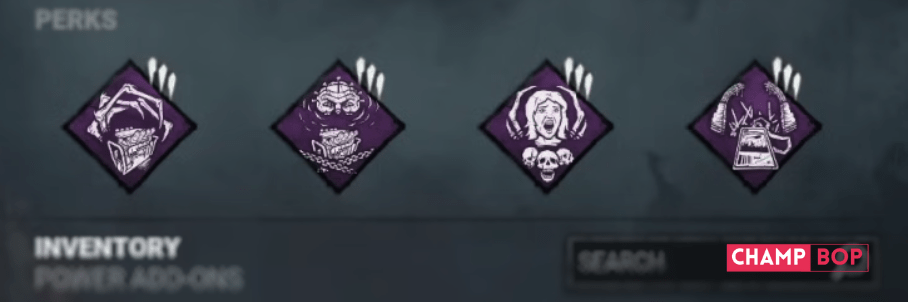
- Corrupt Intervention (The Plague) – At the start of the Trial, The Entity blocks the 3 Generators farthest away for 120 seconds.
- Deadlock (The Cenobite) – When a Generator is finished, The Entity blocks the Generator with the highest progression for 30 seconds. The blocked Generator’s aura is visible in white during this time.
- Save the Best for Last (The Shape) – Earn a token for each successful basic attack that does not target the Obsession. Each token provides a stackable 4% reduction in the successful basic attack cooldown; you can earn up to 8 tokens. When you hit the Obsession with a Basic or Special Attack, you lose 2 tokens. You cannot gain tokens while your Obsession is sacrificed or killed.
- No Way Out (The Trickster) – When the first Survivor is hooked, No Way Out gets a token. This perk comes into action when the exit gates are powered on. If a Survivor interacts with an exit gate switch, you will hear a loud noise. After that, both exit gate switches will be disabled by The Entity for 12 seconds. For every token you have, 12 seconds will be added to the disabling time.
Aggressive Scourge Trapper Build
This build is based on the classic basement Trapper strategy. It interferes with survivors’ generator progress and movements while allowing plenty of time for important trap placement, leading to efficient pressure and map control.
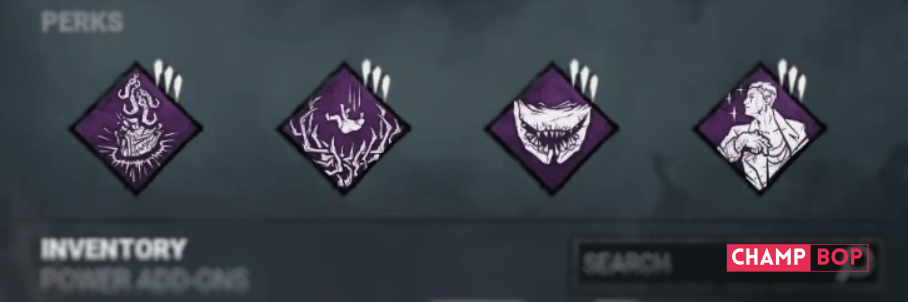
- Scourge Hook: Pain Resonance (The Artist) – At the start of the trial, up to 4 random hooks are changed into scourge hooks. You see their auras in white. You start the trial with 4 tokens. The first time each Survivor is hooked on a scourge hook, lose 1 token and the generator with the most progress explodes, instantly losing 25% of progress, and will start to regress.
- Dead Man’s Switch (The Deathslinger) – At the beginning of the trial, up to 4 random hooks are converted into scourge hooks. You can see their auras in white. You start the trial with 4 tokens. The first time each Survivor gets hooked on a scourge hook, you lose 1 token, and the generator with the highest progress explodes, losing 25% of their progress and beginning to regress.
- Agitation (The Trapper) – Increases movement speed while transporting bodies by 18%. While transporting a body, your Terror Radius increases by 12 meters.
- Starstruck (The Trickster) – While carrying a Survivor, any other Survivors within your Terror Radius become Exposed. The effect lasts 30 seconds on Survivors who leave your Terror Radius, as well as those within it when you hook or release the carrying Survivor. Starstruck has a 60-second cooldown if a Survivor is no longer carried.
Trapper Hex Build
Trapper is an excellent hex perk user. For example, if you bring something like Devour Hope and manage to hook enough survivors, they will be forced to deal with it. In the process, for example, they might trigger trap hexes like Haunted Ground, Retribution, or Undying. You can choose whichever you prefer and set up traps accordingly.
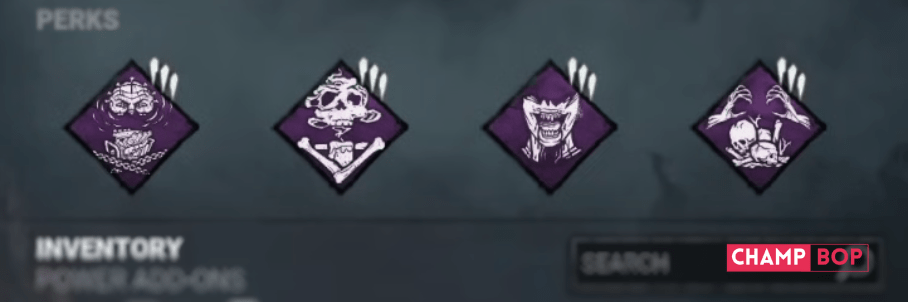
- Deadlock (The Cenobite) – After repairing a generator, The Entity disables the generator with the most progress for 30 seconds. You can see its white aura at this time.
- Hex: Haunted Ground (The Spirit) – 2 trapped Hex Totems will appear during the trial. When one of the 2 trapped Hex Totems is cleansed by a Survivor, all Survivors become Exposed for 60 seconds. The remaining trapped Hex Totem immediately turns into a Dull Totem.
- Hex: Devour Hope (The Hag) – Devour Hope obtains a token whenever a Survivor is rescued from a hook that is in place at an area at least 24 meters far away. 2 Tokens: 10 seconds after hooking a Survivor, you will gain a 5% Haste status effect. 3 tokens: All Survivors are affected by the Exposed status effect. 5 Tokens: Allows you to kill Survivors with your hand. The Hex effects last as long as the associated Hex Totem is active.
- Hex: Pentimento (The Artist) – You may see the aura of destroyed Totems. You can use a ritual to bring back a destroyed Totem as a Hex Totem for Hex: Pentimento. Hex: Pentimento gains an additional effect when many Hex Totems are active at the same time. 1 Hex Totem: Reduces survivors’ repair speed by 30%. 2 Hex Totems: Reduces survivors’ healing speed by 30%. 3 Hex Totems: Reduces survivors’ recovery time from being downed by 30%. 4 Hex Totems: Reduces Survivors’ exit gate opening speed by 30%. 5 Hex Totems: The Entity blocks all Totems.
Best Trapper Add-ons
- Trapper Sack – Causes all Bear Traps to be in your inventory at the start of the trial. You can no longer pick up Bear Traps; instead, you can reset them.
- Iridescent Stone – Every 30 seconds, a randomly disarmed Bear Trap is automatically reset and armed.
- Honing Stone – Survivors who release themselves from a bear trap enter the Dying State.
- Bloody Coil – When a healthy Survivor disarms a Bear Trap, the Bloody Coil demands its cost, causing the Survivor to become injured.
- Fastening Tools – Increases the time it takes to rescue or escape from a Bear Trap by 25%. The speed at which the Bear Trap is set is increased by 50%.