Portia Maye, better known as “The Houndmaster,” is one of the 38 Killers currently featured in Dead by Daylight. She was introduced as the Killer of CHAPTER 34: Doomed Course, a Chapter DLC released on November 28, 2024.
The Houndmaster Killer is a terrifying force, as is the equally intimidating dog that joins the ride. To get the absolute most out of her, we will be going over three different variations of the best Houndmaster builds in DBD.
Best Build for the Houndmaster

In a sense, Houndmaster gets the best of both worlds: the strong perks of M1 killers like Wraith, paired with an oppressive power that lets her consistently land hits, much like Spirit.
The best Houndmaster build stands out because, unlike killers with special powers like Nurse and Blight, her grab doesn’t count as a special attack.
- Starstruck (The Trickster): Survivors within your Terror Radius become Exposed while you carry another Survivor. The effect lasts for 30 seconds after they leave your radius.
- Agitation (The Trapper): Agitation increases your terror radius when you pick up a survivor. This means even more survivors get Exposed, especially if you’re taking your prey on a walk to the nearest Scourge Hook to activate Pain Resonance, which Agitation also helps with.
- Save the Best for Last (The Shape): Earn a token for each successful basic attack on non-Obsession Survivors, reducing basic attack cooldown by 4% per token (up to 8 tokens). Lose 2 tokens when hitting the Obsession, and cannot gain tokens if the Obsession is sacrificed or killed.
- Surge (The Demogorgon): A basic attack that downs a Survivor causes all generators within 32 meters to explode and regress, with affected generators losing 8% progress. Survivors repairing them will scream.
This build is great because it takes full advantage of Houndmaster Killer’s unique ability to benefit from both M1 Killer perks and her powerful grab mechanic.
Agitation increases your movement speed while carrying a Survivor, which allows you to get to hooks faster. Starstruck makes any Survivor within your Terror Radius Exposed when you’re carrying someone. This means that when you hook a Survivor while Agitation is active, any other nearby Survivors are given the Exposed status, making them vulnerable to being downed with a single hit.
You can bait pickups on pallets to lure out nearby survivors, send Snug (her dog) and grab them, safely pick up the survivor off the pallet, then go over and smack the still-grabbed survivor who is now Exposed.
STBFL feels great to use with Snug’s short chase cooldown. Surge allows you to apply consistent generator regression when downing survivors within range.
Bounty Hunter Houndmaster Build
The Bounty Hunter Houndmaster Build is centered around constantly cycling between obsessions, ensuring that they are exposed, revealing their position, and controlling the match’s tempo.
- Friends ’til the End (The Good Guy): Hooking a survivor who is not the obsession exposes the obsession for 20 seconds and reveals their aura for 10 seconds. Hooking the obsession causes another survivor to scream and become the new obsession.
- Furtive Chase (The Ghost Face): Hooking the obsession grants the undetectable status effect and a 5% haste bonus for 18 seconds.
- Grim Embrace (The Artist): Grim Embrace gains a token each time a survivor is hooked for the first time. Moving 16m away from the hook blocks all generators for 10 seconds. At four tokens, generators are blocked for 40 seconds, and the obsession’s aura is revealed for 6 seconds.
- Surge (The Demogorgon): Downing a survivor with a basic attack causes all generators within a 32m radius to explode for an 8% progress loss.
The synergy between Friends Till the End and Furtive Chase allows the Houndmaster to stay undetectable and gain speed, making it easier to hunt down survivors while using the obsession.
Grim Embrace helps with map control by blocking generators and punishing survivors when you hook the obsession. While the Surge perk also increases pressure by regressing generator progress with every down.
Overall, this build helps in applying constant pressure and makes it difficult for survivors to regroup or complete objectives.
Generator Pressure Houndmaster Build

This Generator Pressure Houndmaster Build focuses on perks that provide a solid way to control the game and apply constant pressure on survivors.
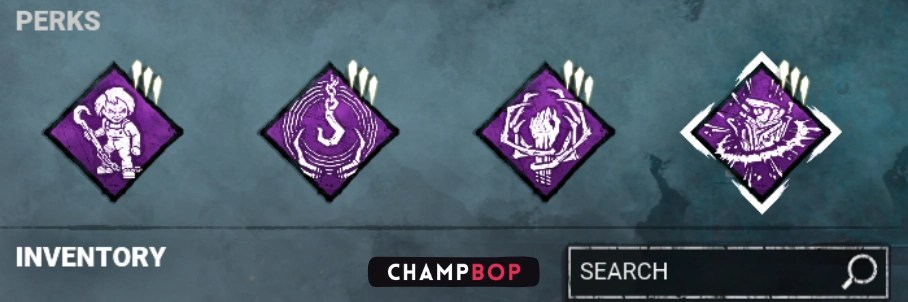
- Scourge Hook: Jagged Compass (The Houndmaster): At the start of the Trial, four Hooks are changed into Scourge Hooks, and you see their auras in white. When a Survivor is unhooked from a regular hook, that hook becomes a Scourge Hook. When a survivor is hooked on a Scourge Hook, it reveals the aura of the generator with the most progress for 10 seconds.
- Pop Goes the Weasel (The Clown): After hooking a Survivor, the next generator you damage instantly loses 20% of its progress. Normal generator regression then applies. Pop Goes the Weasel lasts for 45 seconds after a Survivor is hooked.
- Nowhere to Hide (The Knight): When you damage a generator, reveal the auras of all other Survivors within 24 meters of your position for 5 seconds.
- Oppression (The Twins): When you damage a generator, up to 3 other random generators start regressing. Survivors repairing those generators will trigger a difficult Skill Check.
This build focuses on map control and generator disruption. Jagged Compass helps you locate high-priority generators, Pop Goes the Weasel quickly regresses a generator after you kick it, and Nowhere to Hide helps you find survivors, giving you aura location intel. Oppression forces survivors into difficult Skill Checks while regressing multiple generators, keeping constant pressure on them.
Best Houndmaster Add-ons
- Barley Meal: Barley Meal is simply the best. It adds 20% to the Initial Chase Path’s distance. It feels perfect and consistent, having the dog go further initially. If survivors aren’t looking behind them, you get grabs earlier, and if they are, you can zone them away from strong tiles at a further range.
- Creature’s Bone: Decreases the dog’s stun duration by 50%. Snug getting stunned turns you into Trapper without traps, so reducing his stun by 50% very consistently helps a lot in chase, especially as more survivors figure out her counterplay.
- Iridescent Wheel Handle: Increases the Dog’s Linger duration by +20% at the target location of the Search Command and grants the Undetectable status while the Dog is searching. The status effect is removed if the Houndmaster touches the Search Path.
- Gunpowder Tin: Increases action speeds by +40% for 20 seconds after a Survivor is affected by Houndsense for breaking breakable walls, breaking pallets, and damaging generators.
- Marlinspike: Causes Survivors within 20 meters of The Dog grabbing a Survivor to become affected by Houndsense.
- Spiked Collar: Causes Survivors injured while grabbed by the Dog to suffer from Haemorrhage and Mangled Status Effects for 45 seconds.